Friday 23 November 2012

Stitches, Patterns and Dyeing

I love stitch dictionaries and never fail to marvel at the seemingly never ending combinations that produce an infinite number of patterns.  Just by placing a yarn over before or after a knit 2 tog changes the way the pattern looks.  This makes designing a real challenge, but when is a design unique?

This question is posed in the light of a copyright statement on a scarf which is done in the sea foam stitch.  Google 'seafoam stitch' and numerous sites show how this delightful stitch creates the illusion of foam as it 'mimics the undulating movement sea foam makes as it lies on top of the water'.  This stitch makes use of the double yarn over and is worked over a multiple of 10 plus 6 stitches and the instructions can be found for free on several sites.  But if you want to make a scarf using this stitch to sell you are supposed to purchase the pattern which grants you the right to sell items made from the pattern!  Surely copyright protects your intellectual property, but these patterns have been around for centuries, and were exchanged between knitters freely, as can be seen in the surviving hand-knitted lace samplers. 

Currently I am currently knitting/designing a poncho

 
This one starts at the cowl neck and is worked from the top down - so no seams, just cast on, knit and then cast off and its ready to wear! This sample is knit in some bulky yarn that I dyed for another project, I could dye some more, but I'm not sure that I want a poncho in this colour!

Which brings me on to dyeing and this week's experiments.  This last week has been wet and windy and much of the countryside is flooded, including the area between me and Dorset, so my planned trip to this county has been delayed until the waters go down!  So in the meantime and to keep me from going slightly bonkers I have been experimenting with dye absorption - or to be more precise how much dye can a fibre absorb? 

To make my poncho I have decided that I need a dark colour - can't decide between dark winter green or red - or going down the safe route of dark gray or even black. But which ever colour I chose it has to be a very solid colour.  These pencil rovings, approx 250grams in weight, have each been dyed with 15grams of dye powder and are uniform in colour, but best was there was no exhaust and the resulting colour is uniform!

 
Now all these tests are fine, but I procrastinate - I really need to be a brave girl and make a decision and dye the yarn so that I can knit the poncho before winter gives way to spring!


Monday 19 November 2012

When is a spinning fibre not a spinning fibre?

Answer when it is dyed by Colinette!

Here I am quoting directly from their web page 'Our rovings are made from 100% merino fibre at 23.5 microns and are just great for all types of felting and spinning projects. Each length is approx 140g in weight and hand dyed to our stunning range of shades. So time to roll up your sleeves and get stuck in – no double sided sticky tape needed here though.'

The sticky tape bit, is supposed to be a joke, but it is no joke trying to spin with this fibre.  One thing I must say is that a takes a lot of skill to ruin fine merino - but they have managed it superbly.  I was drawn by the vibrant colours and bought 5 rovings from the Spinning Weal in Clevedon back in July.  Due the Olympics and Paralympics I did not get around to spinning one of the rovings until September - I could not believe that anyone would sell such rubbish.  To get anything that could be drafted I had to tear the fibres apart and you could hear the fibres breaking as you pulled.  Each and every bit had to be pulled apart until it was smaller than pencil roving and then it was still matted.  Thinking that it might be a one off I looked at the other rovings, they are just the same.  Then I did some research on Ravelry - where I found lots of similar reports and I give a sample here:

'the roving was extremely hard to work with, almost felted throughout. I’m not sure if this was intentional or not, but provided quite a challenge to work though'.

'badest roving I’ve ever spun, many many felted parts, no fun in spinning :('

'There were three felted areas in this roving, causing me to just discard it.'

'I love a lot of the Colinette yarns, so when I saw they also had roving in their webshop for a very good price, I was over the moon! So I ordered six different colours, thinking I couldn’t be dissappointed. I was wrong. I haven’t tried spinning with any of them yet, but I don’t like the look of them at all. I can’t really explain what’s wrong with it, but I don’t think they will spin up nicely, or if they do, I will have to put quite a bit more effort in it than usual. Also they smell very acidy from the dye bath, it was like opening up a bottle of vinegar when I opened the bag.'

'so much color came out when I washed this'

When I showed my 'Jewel' roving to Sarah at the Spinning Weal she said that she was 'only selling them for felting now' - but I was sold them as a spinning fibre and so were a lot of other people - there are 56 stashed on Ravelry all for spinning - a few lucky souls have done so - but these seem to have been early dye lots (mostly 2011 and early 2012) - mine are all dated June 2012 - steer clear!

I have just left a review on 'Jewel' - but I doubt that it will get approval!!!

YOU HAVE BEEN WARNED

Friday 16 November 2012

Just a quick update

Thought I would update yesterday dyeing with a few photos of the results..............


First Grayscale on Falkland, the top braid was dyed in the exhaust of the first bottom braid and definitely has a good gradient.


Next Brights again on Falkland, there is more gradient in the pink than the photo shows and interestingly what should have been the medium turquoise has come out darker than the dark!


Not a bad day's work!


Can't decide whether to split the braids in half and then two ply, of spin down the whole braid and n-ply - decisions, decisions.......................

Thursday 15 November 2012

Gradient Dyeing

Its Thursday so its dyeing day!  Thursday mornings are all mine - Mr S goes to his wood turning class and I have four hours of completely me time.  Very selfishly I let nothing come between me and this very precious time.  Its not that I don't love Mr S to pieces, but some times you need space to be yourself and this is what Thursday mornings have become.................. a man free fibre time.

Today I am experimenting with gradient dyeing.  I have dyed yarn by this method before, but attempts to dye roving haven't been as good as I had hoped for.  Some of this may be due to physical and space restraints, and some I must put down to operator error.  The major problem as I see it, is too ensure that the colour seamlessly changes - no blotches or bleeding.  My usual dyeing method just doesn't allow for this.

For spaced dyed tops I either arrange the top in a spiral or in equal length strips and then apply the dye - this is not unique and there are examples of these methods in numerous blogs and on line tutorials - so I am not going to go into detail.  These methods do not work, for me at least, for gradient dyeing - so how to achieve the desired result.

It seemed obvious that there had to some physical division between the shades and that cling film wasn't up to the task - I had even tried clipping between colours, but then I had a portion of undyed yarn where the clips had been - another failure.  Whilst in a well-known supermarket the other day I notice that for the princely sum of £1.23 I could get four beer glasses - very thick glass, but fairly straight sided and with a capacity of 570ml or one pint in old money - just the job.

So four glasses with 500ml of water and decreasing amounts of dye solution are currently steaming gently. Normally I use a microwave, but was worried that the fibre that was not completely submerged would dry out and burn.

So here is how I did it:

 
Back Left - Black DOS 4, Back Right - Black DOS 1, Front Right - Granite DOS 0.5 and Front Left -- no dye. I put one end of the top in the back left glass and the other in the front left, and put the middle section equally in the two right glasses.  Point to remember - put the glasses in the steamer basket first, it was quite difficult to move four glasses full of fibre and dye............


Here are the four glasses in the steamer - I had to use the second basket upside down to get enough height and the lid doesn't fit that well, so there was some dripping, but nothing topping up didn't cope with.

This is the first 50grams after rinsing

There was quite a lot of exhaust so I put another 50grams of fibre in the dyes and it was all absorbed


So now I am trying anther 100grams - with turquoise and pink this time.  Although this method seems to be working fairly well, but I am only dyeing 50 grams at a time - need to find a way to increase to at least 100grams - litre glasses perhaps, but they fit in the steamer? 


Sunday 11 November 2012

When is a craft not a craft?

I pose this question because yesterday I went to a 'Craft Fair', one of three that were being held in a six mile radius of my home.  The advertising for this event emphasised the 'craft' element of the event both in the local paper but also on all the signage and when I got there crafts there were not.

Is there any craft element in selling Cash and Carry sweets (two stalls), a selection of 'made in China' type Christmas decorations, which had obviously been bought wholesale (I found the site they were bought from on Google in about three seconds), battery operated plastic helicopters, mass produced jewellery, tarot card reading, face painting?  There is absolutely no craft in the stall advertising the Pampered Chef franchise which was trying to get you to host a party plan selling thingy and nor in the stall selling second hand clothes.  What craft is there in a children's book stall with books from The Book People?  There was the essential to every craft fair - handmade card stall but this one was also selling rolls of Christmas wrapping paper and gift tags, baubles and garlands none of which had been hand-crafted.

So all in all a real disappointment - had been advertised as a Christmas Bazaar then this would just about have fitted the bill, but a Craft Fair it was not.  Perhaps I have been spoilt by the wonderful Fibre Festivals and 'proper Craft Fairs' but it seems that despite the supposed revival of making things - Cath Kitson and Kirsty Allsopp immediately spring to mind - there is still a mass throw away cultural with little or no thought to how or where things have be made.  My immediate thought when seeing a young girl spending her pocket money on a mass produced  Christmas robin (one that most likely had been made by a Asian child little older than the purchaser) was sadness and confirmation that Christmas is little more than a commercial festival which targets those who can least afford the tat that passes for craft.

To add to this - there was a entry fee of £1..............................  as most of the things on offer could have been bought from a £1 Shop it would have been cheaper to have had a morning out there...............

Wednesday 7 November 2012

Its Woolly Wednesday in Wovember

Its Wednesday and its November so it must be Woolly Wednesday and time to talked about woolly things!

There has been a lot of discussion on Ravelry about whether it is right to celebrate all things woolly in November by using the synonym Wovember, because it is degrading the Movember movement which raising money to research prostate cancer and testicular cancer.  I don't want to into the rights and wrongs of using similar names, just to say that I support both!  I love all things woolly and Mr S used to sport a very stylish moustache until his diagnosis with Sleep Apnoea made it impossible.

Right Woolly things - and particularly spinning and spinning wheels.  I have been a very lucky/naughty/bad/good (delete as you think appropriate) girl as in the last two weeks I have acquired two spinning wheels.

 
Frances - A Frank Herring
Nellie - this maybe an early Williamson (Timbertops) or not! (The jury is out at the moment)
 
 
Why you may ask does anyone want/need more spinning wheels?  I would counter this with 'why not'!  Every spinning wheel is different - yes I know that a wheel is a device for putting a twist in fibre and then storing it - but different wheels have different ratios and it is ratios that make for very different finished yarns. 
 
Ratios - love them or hate them - are necessary if you are going understand the properties of the finished yarn.  Basically high ratios make fine yarns and low ratios make thicker yarns.  To work out the ratio of your wheel count the number of times the flyer/whorl goes round for one turn of the drive wheel, if you have more than one groove on your flyer then you will be able to spin with different ratios and therefore make different yarns.  For example Nellie only has one groove and a ratio of 3.25:1, which means that I am going to able to spin some lovely art yarns (more about art yarns later), and is lower than the old Ashford Country Spinner! 
 
Frances is a double drive wheel and has three ratios  7:1, 6.75:1, 6.25:1 this means that she will make finer yarns than Nellie, but not as fine as my Ashford Joy which has four ratios, 6:1, 8:1, 11:1 and 14:1. I use the 14:1 to spin my lace yarn.  There is the twist per inch brigade, and I think that it is too easy to get hung up on this - obviously tpi is important, but it is more important that the yarn you are producing has a even quality and more importantly spinning and plying should be enjoyable, so unless it is really really important to you to know exactly how many tpis there is in your yarn - my advice is relax, it can't be good to be sooooooooooooo hung up on counting the twists that you have lost all the pleasure.  But if it is important to you here is a short explanation:
 
For a yarn with 10 tpi, place the drive band in the groove of the flyer/whorl size closest to 10:1. This means is that one revolution of the drive wheel will put 10 twists in one inch of the yarn. Therefore, if you draft one inch of fibre, hold it for one revolution of the wheel and let the yarn wind onto the bobbin, you will be spinning a yarn with 10 tpi. You can vary this - for example you let in more fibre you will get less twists, or stick to one inch and do two revolutions you will get more twists. 
 
Then there is the worsted versus woollen debate, which I mostly get wrong, but here goes!  Worsted spun yarn uses combed fibres which all lie parallel to each other (usually called top or roving in the UK), and the yarn is spun from this. Which means that the lustre of the fibre in enhanced and you get a strong dense yarn without too much trapped air.  Woollen uses carded fibre where is fibres are rolled up and spun, which means that the fibres are all over the place and you get a lot of air in the yarn which makes them more bouncy and lighter, but without the sheen of worsted spun yarn.  Hope that makes sense .  Obviously different fleece is more suited to either woollen or worsted eg Longwools are better spun worsted and shorter fibres, like Downland breeds are better spun woollen
 
Writing this has just brought to my attention that I really don't have a wheel with a lace flyer - this will obviously have to be addressed in the very near future and I am in deep discussions with Mr S over a remedy that doesn't include the purchase of another wheel..............


PS Hope you remember to put your clocks back last week!

Thursday 1 November 2012

There are Gremlins about the house

I have come to the conclusion that we have gremlins, not the Bagpuss type that put things right, but the nasty sort that get into drawers and create havoc.

I am not the tidiest person in the world, but I do try to keep my ever growing stash in a semblance of order. While on the subject of tidy I will let you into a secret - Mr S is even worse (he will deny this), but if he is the super tidy person his mother told me he was, who or what covers the worktops in the utility room with 'things'?  Regularly, but not weekly, I clear off the things that have accumulated on the worktops, wipe it down and leave everything fairly neat and tidy - wow!  No sooner than the worktop is clear, than somebody or something starts putting things in the clean and empty space..... 

Now there are only two people and a cat in this house, and Molly doesn't have much in the way of possessions, the odd ball with bell, and other cat type toys, but she definitely doesn't have an electric drill, or an electric screwdriver or, for that matter, any sort of tool electric or otherwise, nor does she have any paint brushes gradually drying out in jam jars, or tubs of wood glue.  I on the hand, do have an electric screwdriver, but mine's pink and lives in its special case in my work room!  So if it isn't Mr S then it must be the gremlins...............

My stash is divided into four types - yarn for knitting and dyeing, fibre for dyeing and spinning, material for quilting and largest 'everything else'.  For long term storage I have large Ikea plastic tubs with clip down tops, for the more day to day, must be able to get at stuff,  I have, again Ikea, black pop boxes and large plastic bags. The theory here is if the bags and boxes aren't in use then they can be folded up and stored thus saving space. In reality I just keep buying more and to date not one has ever been folded up. But the option is there should the need arise!. 

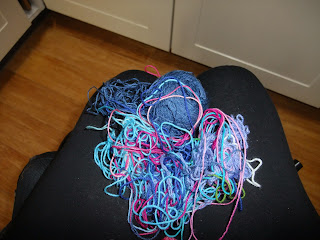
Today I needed some black wool to work the faces on some little snowmen, so I went to the relevant black box, the one that contains my sock yarn skeins, and low and behold the gremlins had been at work!  Instead of lots of neat skeins there was a tangled mess, skeins had twisted together and there was a bit in the middle that looked as it a mouse had made a nest in the middle - this is just small part of the mess!

 
Now a couple of hours later order has been restored, and the snowmen have faces, but how on earth did these inanimate objects interweave themselves around each other? 


These cute snowmen, who are waiting for their hats and scarves, are really easy peasy to make.  I have used my own hand spun, but any White DK will do.  I use the two circular needle method, so start by casting on 18sts using 3.75mm needles and divide between the two needles and make sure the stitches aren't twisted.
Knit two rounds,
Round 3: Increase 10 stitches evenly
R.4-18 knit. 
R19 Decrease 10 sts evenly
R20-21 Knit
R22 Increase six sts
R23-30 Knit
R31 Decrease six sts
R32 Knit
R33 K2tog to end of row and leaving a long tail cut your yarn.

Thread the yarn back through the sts on the needles and draw up tight and finished off.  What you have made is a tube, larger at the bottom, the decrease and increase forms the neck and head - very simple. You could knit a straight tube, but I find that the decrease forms a nice neck for the scarf!

To make a larger snowman you can use more stitches, and for a smaller one use less - for example for the snowman on the left I cast on 18sts, for the middle on 16sts and for larger one on the right 20sts.

Stuff and using the tail from the cast on drawn the edges together and finish off.  With some black yarn give your snowman some eyes, mouth and buttons, for the nose make a french knot in orange.

If you want a hat - Cast on 24 sts, join as for the snowman, rib 2 rounds, then knit for 8-10 rounds and then decrease to form a point - you can really have fun making hats, or head bands, just be imaginative.  For a scarf I either plait or work an i-cord for 6-8 inches.


Just couldn't resist adding this photo of Sam and Sue Snow, he sports a stylish hat and scarf and she has a beaded head band and shawl...................

And here is a really sweet Christmas Tree from Mr S


I have commissioned two very tiny trees to make some earrings - but I fear that they may be to heavy!


Related Posts with Thumbnails